Master Bedroom
We’re in! Actually we’ve been in for about 3 weeks now. I’ve been enjoying my time reading in bed instead of sitting at a computer to blog. Also, the thought of documenting everything I’ve done is a bit daunting, but I’ll start at the beginning…
Floors:
As seen here, the first surface touched was the floors. They turned out so beautifully, I decided to strip and stain the window trim to match.
Ceiling:
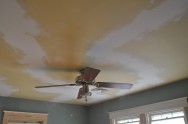
It’s amazing how one small, annoying crack in the ceiling can multiply so quickly. It was repaired once, but improperly, and so cracked again. So I re-fixed it. However, little did I know that the mesh tape in the repair ran the length of the room… Never will I touch a cracked ceiling again. Lesson learned. I’m not a fan of patching plaster. Especially plaster on the ceiling.
Window Trim
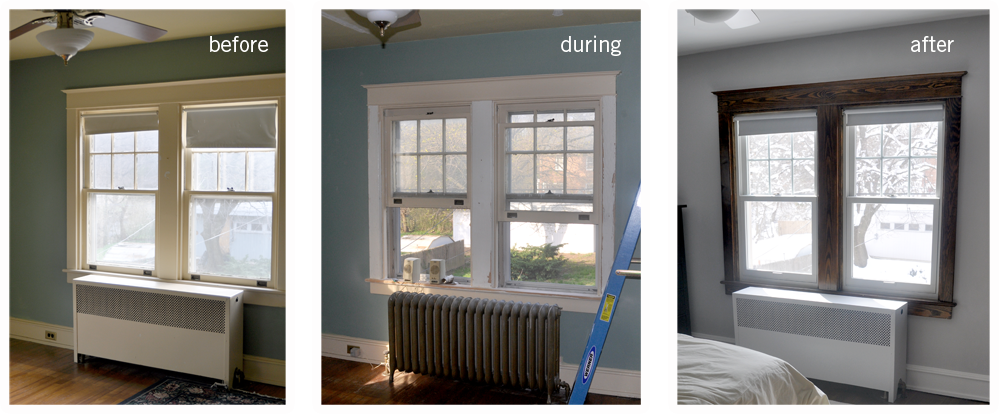
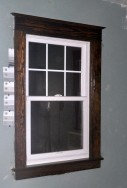
I started on the window trim with the palm sander. (Yes, I did a lead paint test first.) But finished up with chemical stripper. In hindsight, I would have done all the stripping with the brushable chemical stripper for several reasons: no dust, easier to apply, no swirl marks or indentations from the sander, and it did a much better job of removing the paint embedded in the wood grain. Once stripped and cleaned, I applied the leftover stain from the floors, then 3 coats of Spar Varnish, which is good for areas subject to moisture and UV rays. I recommend apply with a brush, not a sponge applicator.
We also had the remaining original single pane windows replaced with Anderson-Renewal windows ($$$). The two rooms with the new windows are considerably less drafty than the others.
Paint:
Before being able to paint, properly, some recon work needed to happen. The previous owners neglected to roughen up the glossy enamel on the all the trim and doors (the entire house) before painting. Hence, the latex layer applied to it is not stable. Breath on it wrong and it chips off. So I painstakingly scraped off the top layer of paint on the trim and doors.
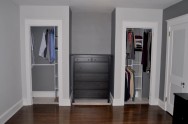
Once done, I lightly sanded, wiped down and primed everything so my paint would stay in place. We opted for a neutral gray, with dark gray accent wall. The thought behind that being flexibility in decorating. I like to change things up. Color is added through bedding, wall art, decoration, etc. I love the way it turned out. It’s calming, like a snowy day, and the warmth of the wood trim is allowed to shine.
Closets:

Once the room was painted, it felt wrong to leave the closets unfinished. One had an exposed AC duct that stuck out like a sore thumb and both shelves and clothing rods were sadly sagging. I removed the existing shelves. Patched more plaster (ugh.) Covered the duct with two boards, primed and painted. We opted for closet organizers to enable more hanging space.
Furniture:
The area rug is a dense carpet remnant (from Reinhart) cut and bound to fit the space perfectly. Feels great on the feet. The leftover was used in the closets and beneath the dresser in the cove to protect the floor. Service and selection was great and the price was right. I’ll be getting the rest of my carpet from them.
Ceiling fan is bought from Amazon. We wanted silver so as to blend in with the room. We also opted for the additional flush mount to keep it as close to the ceiling as possible. It bought us an additional 3″. Only problem is the light flickers and then goes out on it’s own. Something to look into in the future. For now, I’m just glad it works.
Dressers, nightstands and lamps (his and hers) from Ikea. The Hemnes tall dresser fits perfectly in the cove with an inch to spare on either size. I also love the way the dark gray in the cove helps the dresser recede.
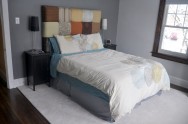
The idea of the french cleat (picture hanging kit) mentioned at the bottome of this post worked out perfectly. After knocking off the old ‘legs’ and covering the back with fabric, I mounted two hangers, each holding 200 lbs., into the wall studs. The headboard sits flush and is stable (and level!). Looks fantastic.
Sheets were my splurge from CB2.

Finishing Touches:
Closet Doors: I’m in the process of scraping the closet doors and painting them two tone. As you can see in the last photo above, the inner panels are the same light gray as the walls. Again, it was a risk, but I’m please with the result.
Chair: I’m in search of a small chair, possibly one I can use as an upholstery experiment.
Mirror: I’ve had a full length mirror for over half my life now, and I admit i feel better walking out the door knowing my pants match my shirt. I’ve my eye on one from either Home Goods or Ikea. It will fill the space between the double window and the closet nicely, with enough room for the closet door to open.
Hooks/Coat Rack: Haven’t decided which one yet. I’m thinking next to the mirror. I’m hoping it will curb clothing ending up on the floor.
Pattern/detail: Some day I’d like to find either vinyl wall decor or a stencil to add texture/interest to the accent wall.
Roller Blinds: The current roller blinds conveniently match the color of the walls. However, I’d like to add more interest. Perhaps with fabric.
